Hand embroidery lets you turn plain clothing into something personal and meaningful. With just a needle and thread, you can add patterns, symbols, or small details that reflect your style. You do not need expensive tools or years of practice. Anyone can learn with the right steps and patience.
If you want a clear and practical guide on how to embroider any design on clothing by hand, this article gives you exactly that. You will learn the tools, stitches, setup, and process needed to stitch clean designs that last through wear and wash.
Understanding Hand Embroidery Basics
Hand embroidery is the process of decorating fabric using a needle and thread. Unlike machine work, every stitch is controlled by your hand. This gives more freedom and character to the final result, as demonstrated in designs from Zuhoor.
When people ask how do you embroider clothing, the answer starts with understanding fabric behavior. Fabric stretches, shifts, and reacts to tension. Hand embroidery works best when stitches are slow and steady.
Hand embroidery differs from machine embroidery in three ways:
- You control stitch length and tension
- The texture looks more organic
- Designs can be placed almost anywhere on clothing
Embroidering clothing by hand works on shirts, jackets, jeans, scarves, and coats. The key is choosing the right fabric and stitch type for each item.
Tools & Materials You Need Before You Start
Essential Tools
You do not need many supplies to begin.
- Embroidery needles: Sharp tips for woven fabric, ball tips for knits
- Embroidery floss: Cotton floss is best for beginners
- Embroidery hoop: Keeps fabric tight and flat
- Fabric scissors: Sharp and small for clean cuts
- Fabric marker or pencil: Washable only
Quality tools matter. Cheap needles bend and damage fabric. Good floss gives smooth stitches.
Choosing the Right Fabric
Beginners should start with:
- Cotton
- Linen
- Denim with light weight
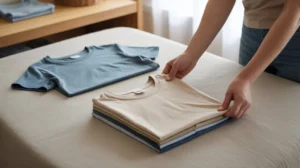
Avoid stretchy fabric at first. It shifts while stitching.Always wash and iron fabric before starting. This prevents shrinkage after embroidery.
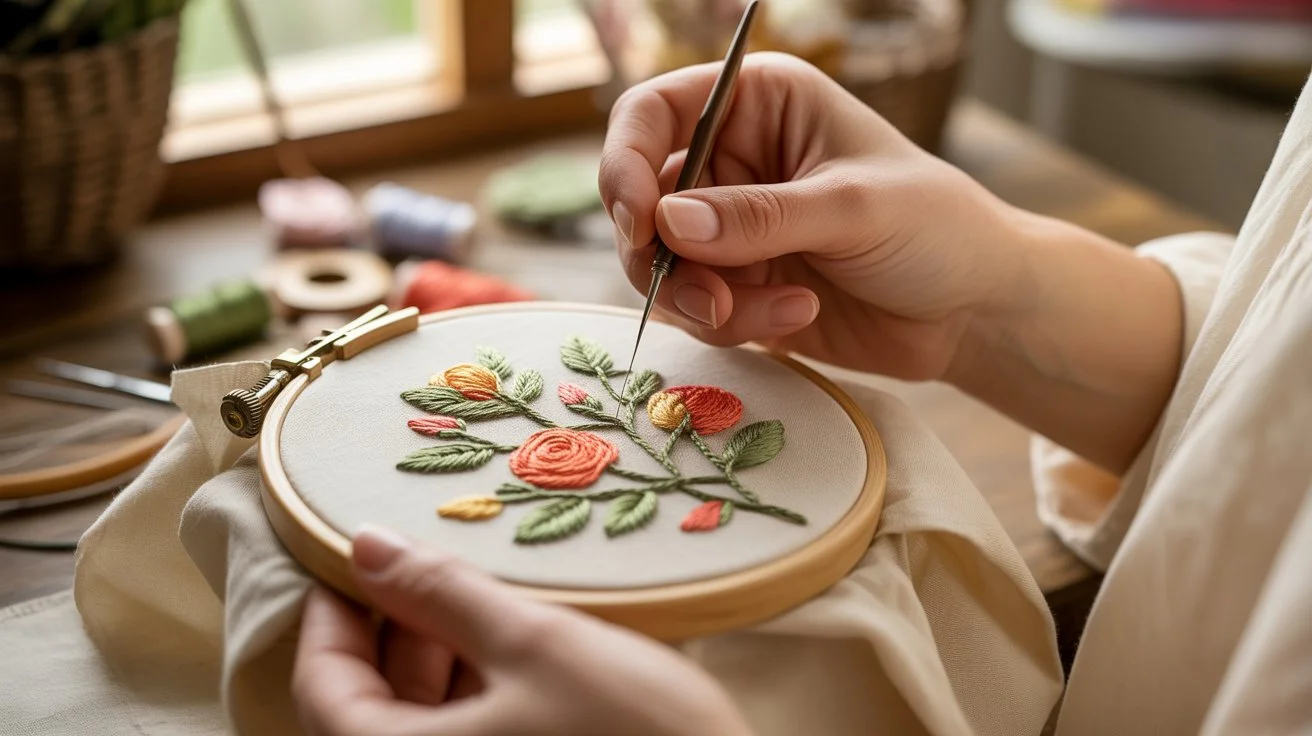
Choosing or Creating Your Embroidery Design
Design choice affects the final look more than stitch skill.
Start with simple shapes. Florals, letters, and outlines are best for practice.
You can:
- Draw your own design
- Use printable patterns
- Trace from reference images
When designing for clothing, placement matters. Chest, cuffs, pockets, and collars work well.
If you sell or style fashion pieces, look at how statement items are designed. For example, a detailed coat like Embroidered Luxe Coat shows how placement and spacing create balance. Brands like Zuhoor use embroidery to enhance garments without overpowering them.
Scale your design to fit the garment area. Too large looks heavy. Too small loses detail.
How to Transfer a Design Onto Clothing
Transferring the design correctly saves time and mistakes.
Common methods include:
- Tracing: Place paper over fabric and trace using light pressure
- Carbon paper: Place between design and fabric, then trace
- Water-soluble pen: Draw directly on fabric
- Iron-on transfer: Useful for detailed designs
Test your transfer method on scrap fabric first. Always ensure marks can be removed.
Setting Up Your Fabric Correctly
Place the fabric in the embroidery hoop so it is tight but not stretched. Loose fabric causes uneven stitches. Over-tight fabric warps the design.Keep the hoop small enough to control but large enough for your design area.
If embroidering clothing seams, adjust the hoop position often. Never stitch through two layers unless intended.
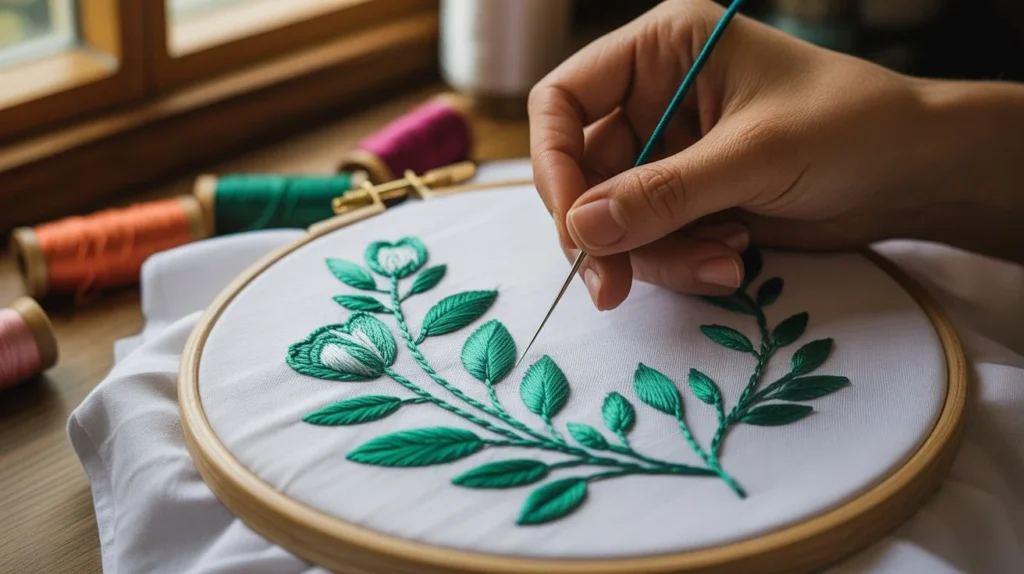
Basic Embroidery Stitches Every Beginner Must Learn
Learning a few stitches is enough to complete most designs.
Line Stitches
Backstitch is used to create clean outlines and readable text. Running stitch works well for simple lines and light texture. Stem stitch is best for curved outlines and smooth borders.
Filling Stitches
Satin stitch creates smooth and solid filled areas. Long and short stitch is used for natural shading and blending colors. Seed stitch adds soft texture and works well for small filled spaces.
Decorative Stitches
French knots are used to create small dots and flower centers. Chain stitch works well for borders and bold decorative lines.
Step-by-Step: How to Embroider Any Design by Hand
This section explains how to embroider any design on clothing by hand in a clear order.
- Thread the needle with 18 inches of floss
- Knot the end securely
- Start stitching from the back of the fabric
- Outline the design first
- Fill shapes after outlines are complete
- Keep stitch length even
- Secure thread ends neatly on the back
Work slowly. Speed causes uneven tension.Check the front often. Small fixes early prevent big problems later.This same process applies whenever learning how to embroider new patterns.
Embroidering on Different Types of Clothing
T-Shirts
T-shirts are made from knit fabric, which stretches while you stitch. This can distort the design if the fabric is not supported. Always use a lightweight stabilizer to keep it firm. Keep the fabric snug in the hoop and use small, even stitches without pulling too tight. This helps embroidered designs, like an Embroidered Charm Bow Shirt, stay smooth after washing.
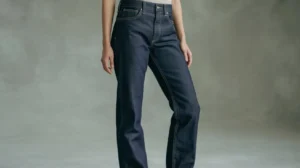
Denim
Denim is strong and stable, so stitches stay in place easily. Use thicker needles for the dense weave and cotton embroidery floss, separating strands for finer details. Take your time over seams and thick areas. Denim works perfectly for jackets, jeans, and pockets, making it ideal for pieces like the Embroidered Edge Denim.
Delicate Fabric
Delicate fabrics such as chiffon, silk, or fine cotton need extra care. These fabrics can tear if the needle or thread is too heavy. Use fine thread and a thin needle to reduce stress on the fabric. Keep stitches small and light, and avoid tight tension. Using a soft stabilizer can help support the fabric while stitching. Always test your design on scrap fabric before embroidering the final piece.
Heavy Clothing
Heavy clothing like coats, hoodies, and sweatshirts requires patience and planning. Thick fabric can be tough on your hands and wrists. Work in short sessions to avoid strain. Use a strong needle and push it through slowly. A thimble can help protect your fingers. For large designs, break the work into sections and adjust the hoop often. This keeps the fabric comfortable to handle and helps maintain clean stitches.
Common Mistakes Beginners Make (And How to Avoid Them)
Mistakes happen. These are the most common:
- Pulling thread too tight
- Using dull needles
- Skipping fabric prep
- Starting with complex designs
Avoid rushing. Practice on scrap fabric. Keep tension even.If stitches look uneven, remove them early. Re-stitching saves the garment.
How to Care for Hand-Embroidered Clothing
Proper care keeps embroidery looking new and clean. Wash hand-embroidered clothing by hand or use a gentle machine cycle. Always use cold water to protect the thread and fabric. Avoid harsh detergents, as they can weaken stitches over time. Let the garment air dry flat instead of using a dryer. When ironing is needed, turn the clothing inside out and place a cloth between the iron and the embroidery.
Extra Tips for Professional Results
- Separate floss strands for finer detail
- Match thread weight to fabric weight
- Plan color order before stitching
- Keep the back tidy
Professionals focus on consistency. Clean backs mean strong fronts.These habits improve results faster than buying better tools.
Why Hand Embroidery Still Matters Today
Hand embroidery allows full creative control. It also supports slow fashion and garment repair.Adding embroidery can extend clothing life. A small stitched detail can hide wear or stains.
Learning how to embroider any design on clothing by hand also builds patience and focus. These skills translate beyond sewing.
Conclusion
Hand embroidery is simple, practical, and creative. With basic tools and steady practice, anyone can add lasting detail to clothing. The process is slow but rewarding.
Once you understand fabric, stitches, and setup, you can embroider almost any design. Keep designs simple at first and improve with each project. With time, your stitches will look clean, confident, and personal. For guidance or questions, contact us.
FAQs
How do you embroider clothing as a beginner?
Start with simple designs on cotton fabric. Use an embroidery hoop and learn basic stitches like backstitch. Practice slowly.
Can hand embroidery be washed?
Yes. Wash gently in cold water. Avoid harsh detergents and do not scrub the stitches.
What thread is best for embroidery?
Cotton embroidery floss works best for most clothing. It is strong and easy to control.
Does embroidery damage fabric?
No, if stitched correctly. Use the right needle and avoid pulling the thread too tight.
How long does hand embroidery take?
Small designs take a few hours. Larger or detailed designs can take several days.